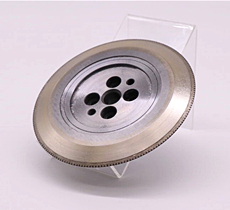
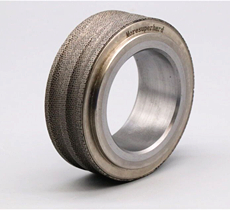
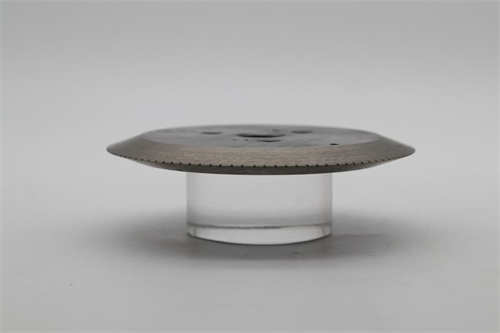
In precision grinding operations, diamond rotary dressers serve as the foundation for achieving superior surface finishes, consistent wheel geometry, and optimal grinding performance. These precision-engineered tools enable manufacturers to maintain exacting tolerances across high-volume production runs, making them indispensable in industries ranging from automotive and aerospace to medical devices and tool manufacturing.
However, the effectiveness of a diamond rotary dresser depends entirely on proper installation and operation. Even the highest-quality diamond dresser will fail to deliver expected results if installed incorrectly or operated with suboptimal parameters. This comprehensive guide provides detailed installation procedures, operational best practices, and maintenance guidelines to help you maximize the performance, accuracy, and service life of your diamond rotary dressers.
By following these proven techniques, manufacturers can achieve:
- Extended dresser life by up to 50%
- Improved grinding wheel consistency across production runs
- Reduced downtime through proper handling and storage
- Superior surface finishes on ground components
- Lower total cost of ownership through optimized performance
The Hidden Costs of Improper Installation
When diamond rotary dressers are installed incorrectly, the consequences extend far beyond the immediate dressing operation:
| Issue |
Impact on Production |
Cost Consequence |
| Poor runout control |
Inconsistent wheel geometry, variable surface finish |
Scrap parts, customer returns |
| Improper speed ratio |
Rapid dresser wear, poor wheel topography |
Frequent dresser replacement |
| Inadequate coolant application |
Diamond damage, thermal stress |
Premature dresser failure |
| Impact during installation |
Diamond layer damage, reduced precision |
Complete dresser loss |
Industry data shows that properly installed and operated diamond rotary dressers can achieve 2-3× longer service life compared to those with suboptimal installation and operation.
Part 1: Comprehensive Pre-Installation Preparation
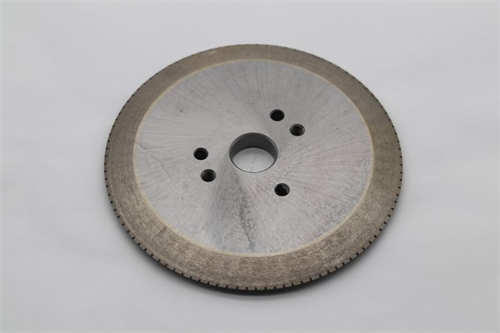
Step 1: Visual Inspection of Diamond Rotary Dresser
Before installation, conduct a thorough visual inspection of the dresser to identify potential issues:
Critical Inspection Points:
| Inspection Area |
What to Look For |
Action Required |
| Diamond layer surface |
Burrs, chipping, uneven wear |
Do not use; contact supplier |
| Metal body |
Deformation, cracks, damage |
Do not use; contact supplier |
| Mounting bore |
Damage, scoring, corrosion |
Clean or contact supplier |
| Surface finish |
Corrosion, contamination |
Clean thoroughly |
Best Practice: Document the condition of each dresser upon receipt. Create a dressers log to track installation dates, performance, and service life across applications.
Step 2: Surface Cleaning and Preparation
Cleaning Procedure:
- Remove all contaminants from both the mounting bore and all contact surfaces
- Eliminate oil, grease, and dust using appropriate cleaning solvents
- Clean the spindle end face thoroughly to ensure proper mating
- Inspect spindle runout of the outer diameter before installation
Cleaning Solvent Selection:
| Solvent Type |
Best For |
Caution Notes |
| Isopropyl alcohol |
General cleaning |
Ensure complete drying before installation |
| Acetone |
Oil and grease removal |
Use in well-ventilated area |
| Industrial degreasers |
Heavy contamination |
Follow manufacturer safety guidelines |
| Ultrasonic cleaning |
Precision applications |
Use non-abrasive cleaning solution |
Critical Warning: Never use abrasive cleaning methods or tools on the diamond layer surface. This can cause microfractures in the diamond structure, significantly reducing dresser life.
Step 3: Spindle Preparation
Spindle Inspection Checklist:
Document spindle condition before installation. If runout exceeds specifications, address the root cause before proceeding with dresser installation.
Part 2: Precise Installation Techniques
Installation Step 1: Lubrication and Initial Positioning
Proper Lubrication:
Apply a small amount of appropriate lubricant to:
- The spindle mounting diameter
- The dresser mounting bore
- Contact surfaces between dresser and spindle
Lubricant Selection Guide:
| Application Type |
Recommended Lubricant |
Purpose |
| General purpose |
Light machine oil (ISO VG 32) |
Prevents galling, aids installation |
| High-precision applications |
Anti-seize compound |
Facilitates future removal |
| Stainless steel applications |
Specialized anti-seize |
Prevents galling in corrosive environments |
Critical Tip: Apply lubricant sparingly—excess lubricant can attract contamination and affect concentricity.
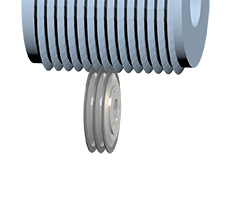
Installation Step 2: Proper Dresser Alignment
Correct Installation Technique:
- Position the dresser vertically above the spindle
- Align carefully to avoid misalignment during insertion
- Push slowly and steadily onto the spindle
- Monitor alignment continuously during installation
Handling Misalignment:
If the dresser becomes misaligned during installation:
| Action |
Do's |
Don'ts |
| Correction |
Gently tap with rubber or wooden mallet |
Use metal tools or hammers |
| Force |
Apply steady, even pressure |
Use excessive force |
| Alignment |
Stop and realign if misalignment detected |
Continue forcing misaligned dresser |
Why Wooden or Rubber Mallets?
Metal tools can cause localized stress concentrations that damage the diamond layer or create microcracks in the dresser body. The shock-absorbing properties of rubber or wooden mallets distribute force evenly and prevent damage.
Installation Step 3: Handling Tight-Fit Installations
When to Use Thermal Expansion:
If the fit between dresser and spindle is too tight for mechanical installation:
Thermal Expansion Procedure:
- Preparation:
- Prepare hot water or hot oil at approximately 70°C (158°F)
- Verify temperature accuracy with calibrated thermometer
- Ensure oil is clean and free of contamination
- Heating Process:
- Immerse the dresser in the heated medium for 8-12 seconds
- Do not exceed 15 seconds—prolonged heating can affect diamond bonds
- Monitor temperature continuously
- Installation:
- Quickly wipe the dresser clean of heating medium
- Apply appropriate lubricant immediately
- Install dresser onto spindle while still expanded
- Allow to cool naturally to ambient temperature
Critical Safety Notes:
- Wear appropriate heat-resistant gloves during heating
- Use proper eye protection when handling hot components
- Ensure the heating medium does not introduce contamination
- Never use direct flame or torch heating—this can damage the diamond bond
Installation Step 4: Runout Verification
Post-Installation Runout Inspection:
After installation, use a precision dial indicator to verify:
| Measurement Point |
Tolerance (Typical) |
Measurement Method |
| Radial runout |
<0.01-0.02 mm |
Measure on metal body, not diamond layer |
| Axial runout |
<0.01-0.02 mm |
Measure on back face of dresser |
| Face perpendicularity |
<0.01 mm/100 mm |
Across entire face |
Critical Measurement Guidelines:
✅ DO measure on the metal body of the dresser
❌ DO NOT measure directly on the diamond layer surface
Why Measure on Metal Body, Not Diamond Layer?
The diamond layer surface may have natural variations that are acceptable for dressing performance. Measuring runout on the metal body provides a more accurate indication of the true mounting concentricity, which determines the dressing accuracy and wheel geometry.
Document runout measurements for each installation and track trends over time. Increasing runout may indicate wear on the spindle or mounting system.
Part 3: Operational Parameters and Best Practices
Critical Parameter: Speed Ratio
Optimal Speed Ratio: 0.2–0.4
The speed ratio between the rotary dresser and grinding wheel is a critical parameter affecting both dresser life and wheel topography:
Speed Ratio Calculation:
plaintext
Speed Ratio = Dresser Peripheral Speed / Grinding Wheel Peripheral Speed
Recommended Practice:
| Application |
Speed Ratio |
Dressing Direction |
| General precision grinding |
0.2-0.3 |
Down-dressing |
| Fine finish applications |
0.3-0.4 |
Down-dressing |
| Heavy stock removal |
0.2-0.25 |
Down-dressing |
| Form grinding |
0.25-0.35 |
Down-dressing |
Why Down-Dressing is Recommended:
Down-dressing means the grinding wheel and dresser rotate in the same direction at the contact point. This approach offers several advantages:
- Reduced dresser wear compared to up-dressing
- Better chip evacuation from the dressing area
- More consistent wheel topography across the wheel surface
- Lower grinding forces in subsequent grinding operations
Avoid up-dressing unless specifically required by your application. Up-dressing increases dresser wear and can cause inconsistent wheel geometry.
Dressing Coolant Requirements
Coolant Application Guidelines:
| Factor |
Recommendation |
Impact on Dresser Performance |
| Delivery pressure |
High-pressure (3-5 bar) |
Ensures proper cooling at interface |
| Nozzle positioning |
Precisely at dressing zone |
Maximizes cooling effectiveness |
| Flow rate |
15-25 L/min per cm width |
Removes debris, prevents thermal damage |
| Coolant type |
Neutral oil-based when possible |
Prevents dresser corrosion |
Coolant Type Selection:
| Coolant Type |
Advantages |
Disadvantages |
Best Applications |
| Neutral oil-based |
Excellent lubrication, no corrosion |
Higher cost, flammability concerns |
High-precision operations |
| Water-soluble |
Cost-effective, good cooling |
Potential for corrosion with improper maintenance |
General purpose grinding |
| Synthetic |
Consistent performance, long life |
Higher cost, less lubrication |
High-speed grinding |
Critical Warning on Coolant Chemistry:
Excessive acidity or alkalinity in coolant can cause corrosion of the diamond rotary dresser. Monitor coolant chemistry regularly and maintain pH within manufacturer-recommended ranges (typically 8.5-9.5 for water-soluble coolants).
Dressing Operation Best Practices
Critical Pre-Dressing Checks:
| Check |
Purpose |
Action Required |
| Wheel condition |
Ensure wheel is not loaded or glazed |
Dress wheel if necessary |
| Coolant system |
Verify proper flow and pressure |
Adjust before starting |
| Safety interlocks |
Ensure all guards and protections in place |
Do not bypass safety systems |
| Dresser position |
Verify dresser is properly positioned |
Adjust as required |