Preparation Before Installation
1. Check whether the roller mark is consistent with the processed product model; measure the thickness of the roller, washer, and compression nut, compare the length of the roller installation shaft, and make the roller installation position appropriate
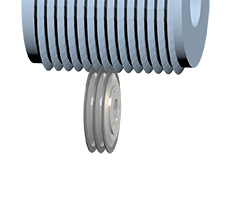
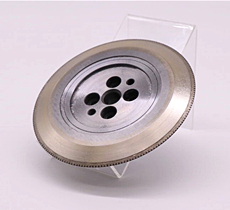
2. Visually inspect the appearance of the roller to see if there is any damage, especially the inner hole, end face and outer reference surface of the roller must not have burrs, deformation or protrusions. If there are burrs or protrusions, use mirror-like sandpaper to remove the burrs, use oilstone to flatten the protrusions, or manually grind the end faces by a professional fitter. Take care not to damage the parallelism of the two ends of the roller; (roller 0.002)
3. Thoroughly clean the roller and remove the grease and dust on the inner hole, end surface and outer circle of the roller, blow dry with a high-pressure air gun or wipe with a dust-free cloth to ensure that the inner hole and end surface of the roller must not have any impurities adhering to the surface
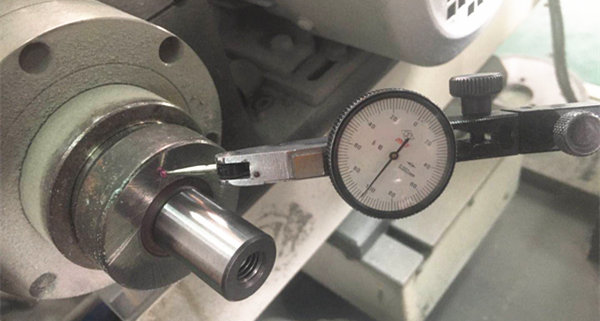
4. Clean and check the roller installation shaft and wipe clean the end surface and outer circle of the main shaft, and no impurities should adhere. The burrs and rust spots can be polished with mirror-phase sandpaper. Use a dial indicator to check the beating of the end surface and outer circle of the main shaft. High-precision roller The end face and radial runout of the installed spindle should be within 0.001
5. Clean the installation washer and compression nut and no impurities adhere to the surface
*
Note: There must be a washer between the end face of the roller and the compression nut. The washer is precision processed by flat grinding. The parallelism of the two ends of the washer is 3um; the perpendicularity between the end face of the compression nut and the center line of the threaded hole is not more than 5um. There are burrs or bumps.
Installation
1. Trial assembly of the roller, feel the gap between the roller and the spindle
• Apply a small amount of lubricating grease or grinding head oil to the end surface and inner hole of the spindle and roller to facilitate installation and prevent rust;
• Push the roller slowly into the spindle and paying attention to the vertical. Use a rubber or wooden hammer to gently tap the side of the roller, correct the direction and push the roller in If the installation is difficult to push in due to side deviation. It is strictly forbidden to hit any part of the roller with a metal tool, which may damage or deform the surface.
• During trial installation, The roller should be immersed in boiling water at about 70°C for about 10 seconds to enlarge the inner hole of the roller, then wipe it clean quickly, apply oil, and push in Spindle if the gap between the roller and the main shaft is found to be small and difficult to push in.
• Turn the roller appropriately by hand (the main shaft does not move), and feel whether the roller is installed in place, or whether there is any impurities caught in it After the roller is installed on the shaft.
• Install the washer and lock the nut After confirming that it is correct.
* Note: During the entire installation process, ensure that the rollers and spindle are free of impurities, resulting in insufficient installation accuracy.
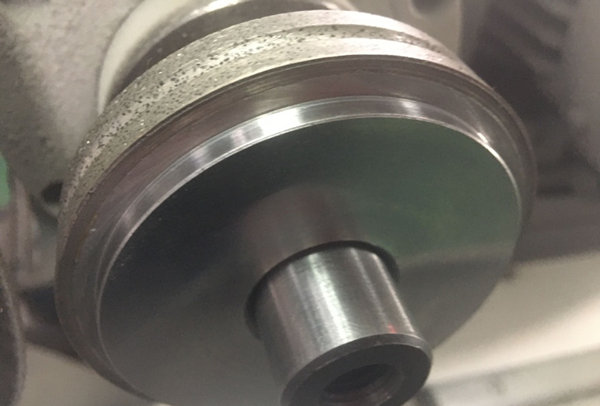
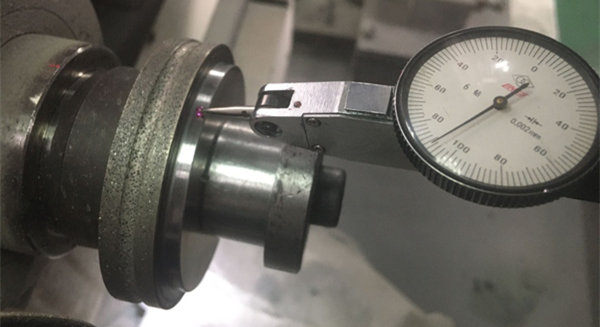
2. Inspection of installation runout
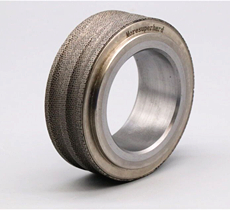
After the roller is installed, use a dial indicator to check the end surface and radial runout of the roller base part (the dial indicator cannot be used to directly check the runout of the diamond layer), and the end surface and radial runout shall not exceed 0.002mm. If the installation fails for many times, you should find the reason or contact the supplier in time.
 3. Roller removal and protection
• Clean the outer surface, loosen the compression nut, remove the washer, and wipe the main shaft part outside the roller. No sand or impurities should adhere to the inner hole of the roller Before disassembling the roller.
• It is also forbidden to use metal instruments to hit any surface of the roller when disassembling the roller. The tightly-fitted roller can be poured with boiling water on the surface of the roller, so that the roller is heated and expanded, and the roller is withdrawn when the main shaft is not heated and expanded. If you encounter a situation that cannot be removed without knocking, you should choose a soft material to knock, such as a rubber rod and a copper rod
• It must be thoroughly cleaned and wiped off. The rust-prone materials should be coated with anti-rust oil, packed in the corresponding box, and handed over to the responsible department or personnel for storage After the roller is removed.
Standard Accuracy of diamond rolls
| Standard Accuracy of diamond rolls |
| Measure of length: |
± 0,002 mm |
| Measure of step: |
± 0,002 mm |
| Radius (for radii < 20 mm) : |
± 0,002 mm |
| Angle (dependent on the side length): |
± 1‘ |
| Evenness: |
± 0,002 mm |
| Line shape: |
0,0015 mm |
| Concentric run-out, related to an area A: |
0,002 mm |
| Cylinder shape: |
0,002 mm |
| Evenness, area of contact: |
0,002 mm |
| Rectangularity, area of contact related to the bore: |
0,002 mm |
| Axial run-out, area of contact related to the bore: |
0,002 mm |
| Concentric run-out, complete profile related to the inspection collar: |
0,002 mm |
| Concentric run-out, diamond coating related to the bore: |
0,003 mm |
| Diameter of the bore: |
Tolerance class H3 |